
Hey everyone, it’s Rodney! 🌟 Today, we’re diving deep into the step-by-step process of creating a concrete countertop for our outdoor kitchen. This post is a detailed follow-up to yesterday’s outdoor kitchen build video, focusing specifically on how we made the concrete countertop.
Introduction
When it comes to working with concrete, it can feel a bit overwhelming. There’s quite a bit of science behind using concrete, and getting your ratios right during the mixing process is crucial. Concrete can be rather unforgiving, but with some patience, research, and practice, you can create a smooth, clean surface. In this blog, we’ll cover everything from building the base structure to finishing and sealing the concrete countertop.
Building the Base Structure
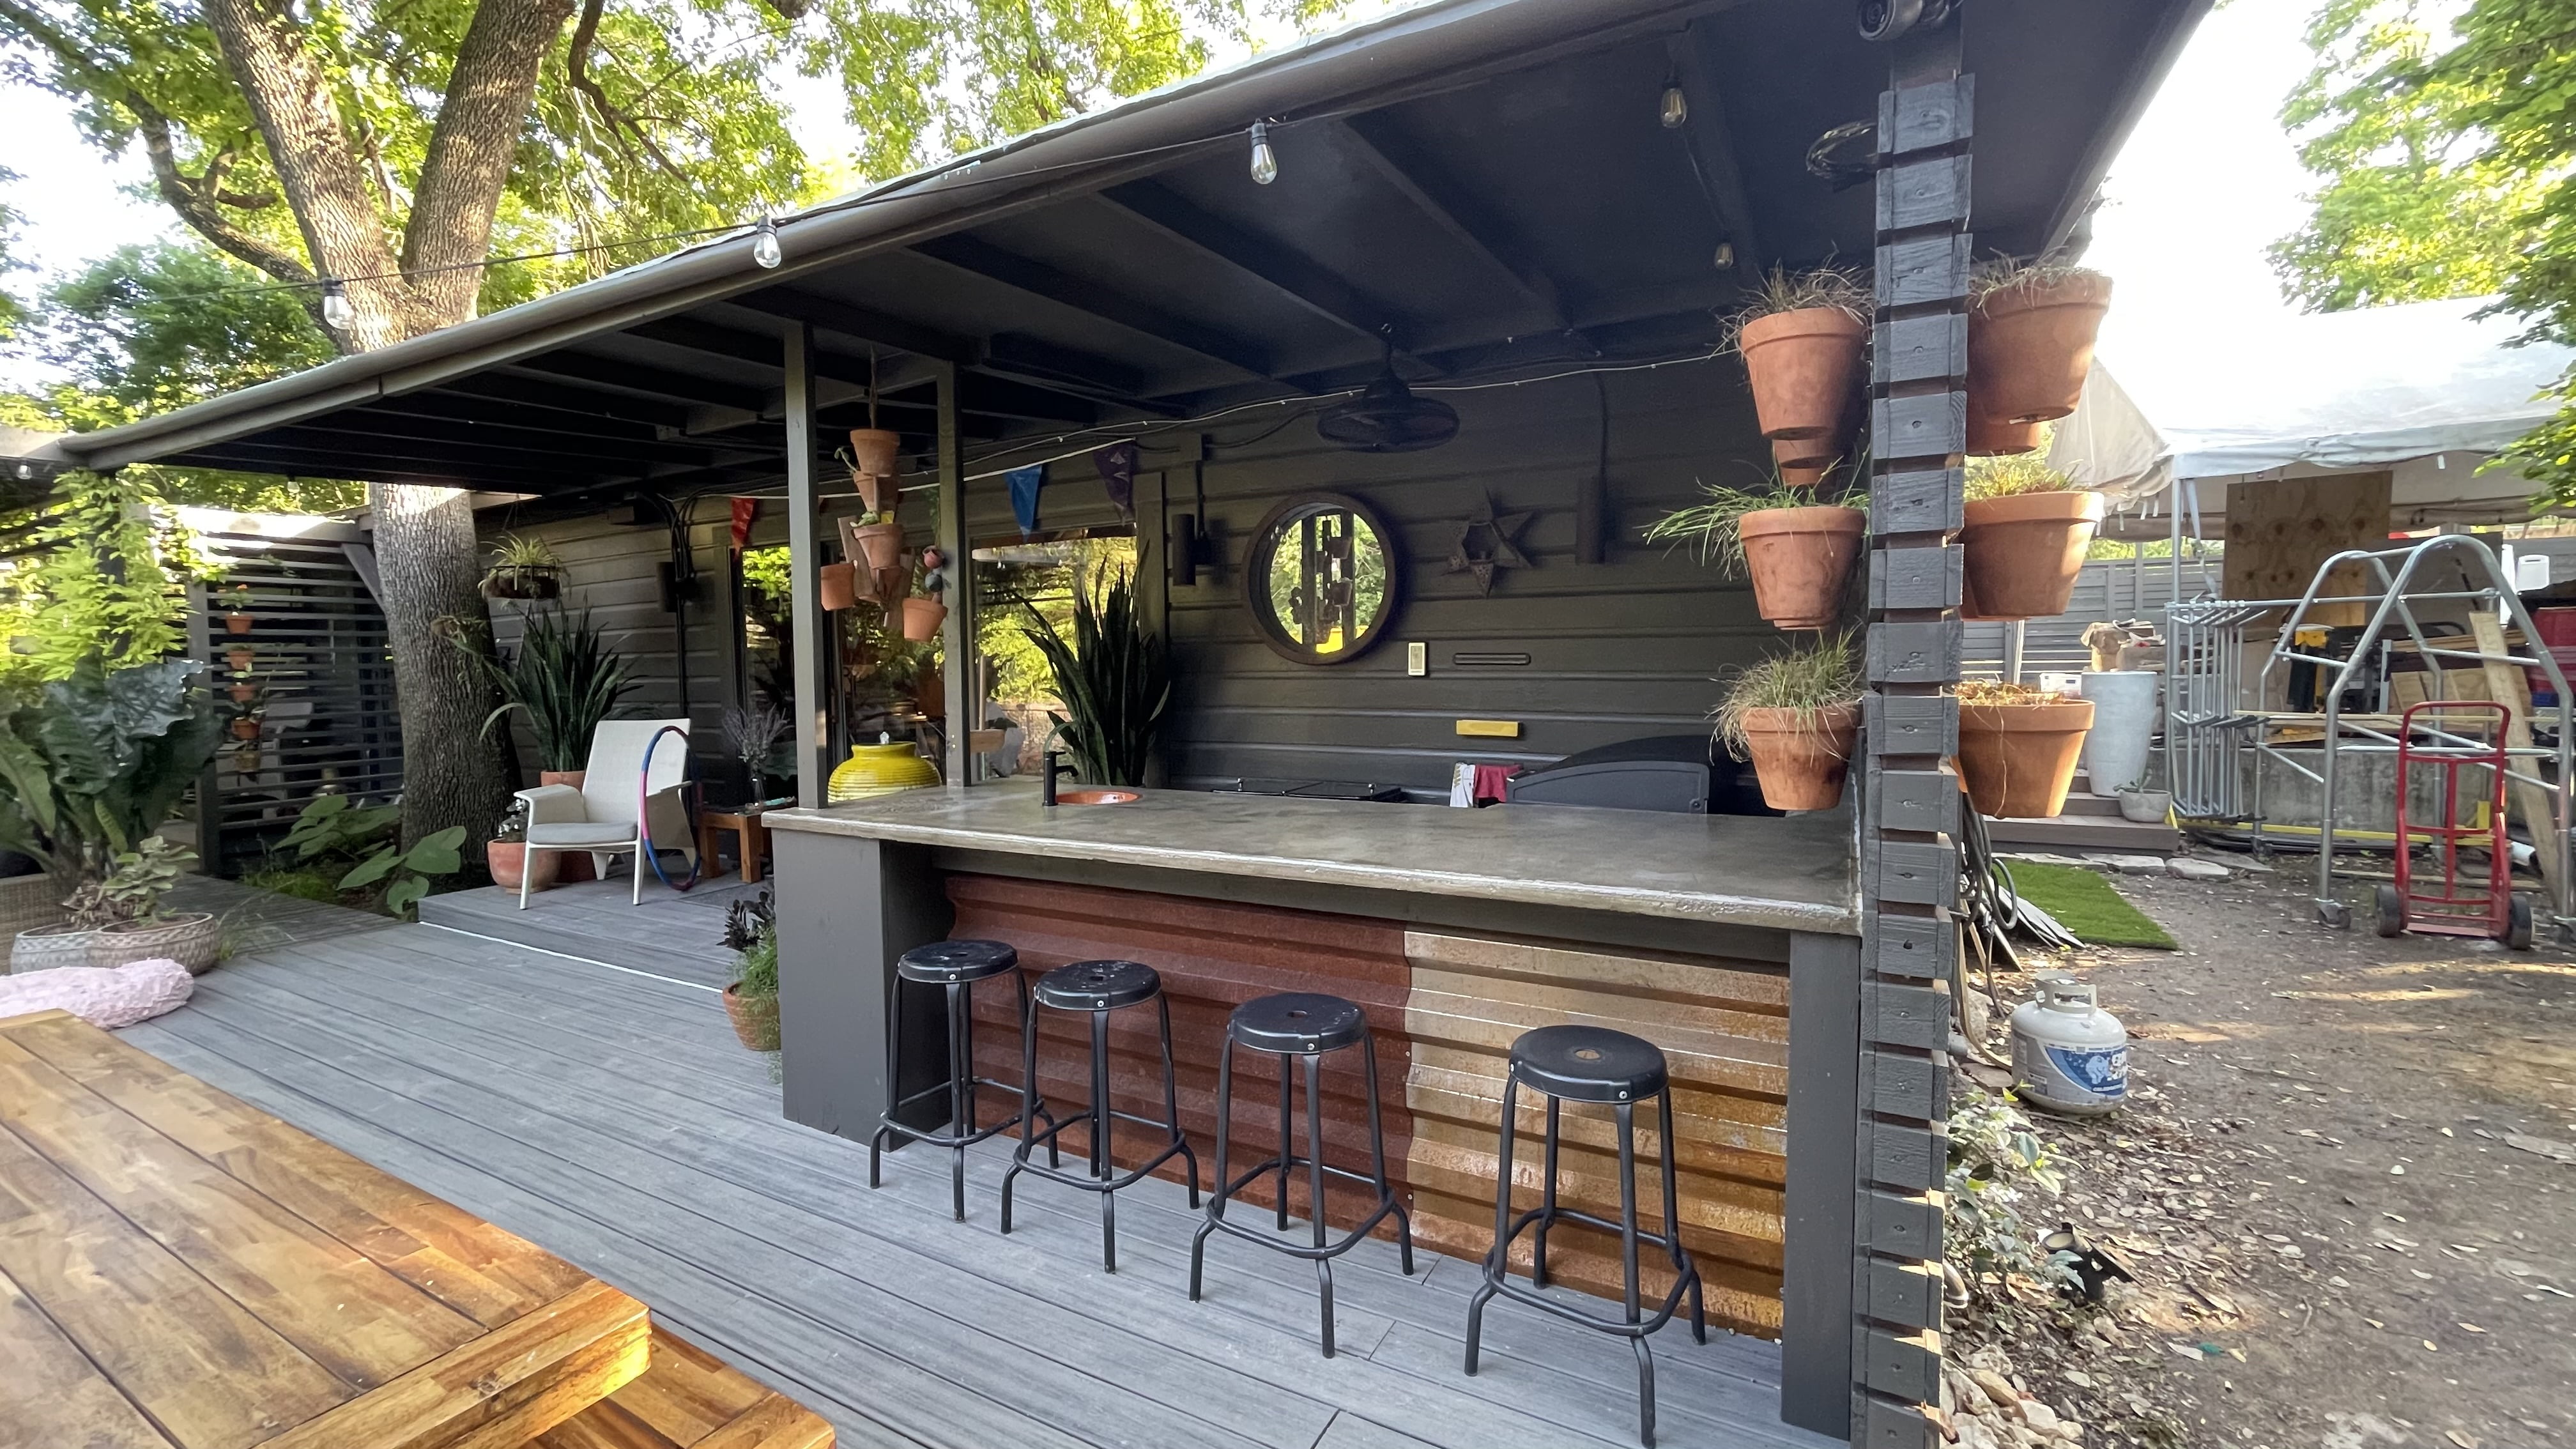
The first step in our process was creating the base structure that we poured the concrete onto. This included the mold, frame, detail, and trim that went around the edge to ensure good coverage all the way around, giving the countertop a floating appearance.
- Choosing the Right Concrete
- We used Quikrete 5000 concrete mix for this project. It’s a high-strength concrete mix that’s perfect for countertops.
- For mixing, we used a standard 5-gallon bucket and a handy mixer that attaches to a drill. This made it easier to mix the concrete in small batches, which is especially important in our Central Texas area where concrete can cure quickly.
- Mixing and Pouring
- Marking the depth on the mixer ensures thorough mixing.
- Working in small batches helps manage the curing time and reduces stress.
- Having a helper to mix while another pours and spreads the concrete is very useful.
- Maintaining Moisture Levels
- Keeping the concrete moist while working is essential for a smooth finish. We used a standard spray bottle to keep both the surface and tools moist.
Finishing the Concrete
Once the concrete is poured into the mold, maintaining the right moisture level is crucial. If concrete dries too quickly, it can develop stress fractures and cracks. If it’s too wet, it can damage the mold or the backer board underneath, leading to failure of the countertop.
- Using Concrete Finishing Tools
- Hand Screed: A 12-inch hand screed with a slight bevel is used at a small angle to push the surface tension of the concrete around, creating a smooth finish.
- Edger Tool: Also known as a quarter round tool, this is used to create a soft curved edge around the top to prevent chipping and make it more comfortable on the elbows.
- Curing Time
- The concrete needs to fully cure before sealing, which can take anywhere from 24 to 72 hours depending on environmental conditions. For our 1.5-inch slab, it took about 24 hours.
Sealing the Concrete
Sealing is a must for concrete countertops. Raw concrete is very porous and can absorb substances like oils, grease, and dirt, leading to stains and wear over time.
- Cleaning the Surface
- After the concrete cured, we used a DeWalt battery-powered power washer to clean the surface, removing any loose debris and ensuring it’s ready for sealing.
- Applying the Sealer
- We used Ghostshield Cryli-Tek 5505, applying three coats to achieve the desired coverage. This sealer penetrates the concrete, providing protection from future damage and staining while giving it a wet look and soft feel.
Design Details
In designing our outdoor kitchen, we wanted bar stools to fit comfortably under an overhang. This required careful planning and additional support:
- Creating an Overhang
- We added framing within the cabinet and extra support on the far side to ensure the countertop could handle the weight without being anchored to the decorative trellis wall.
- Supporting the Weight
- Using 2×4 framing with pocket holes for joinery provided the necessary support. For the mold, we used concrete board (backer board) and 1×4 trim ripped down to 3/4 inch for the detailing.
Foundation Considerations
When constructing or placing an outdoor kitchen, the type of foundation it sits on is critical. Our outdoor kitchen is on a deck section built to support a 10×10 hot tub, providing the necessary strength for our concrete countertop. For standard deck framing, additional support might be required to prevent sagging and ensure durability.
Conclusion
We hope these tips and tricks help you in creating your own concrete countertop. If you have any questions or need further details, feel free to leave a comment below. For more DIY projects and updates, follow us on our website at Rodney and Jake, and check out our Instagram and TikTok @RodneyandJake. Don’t forget to subscribe to our YouTube channel for more videos!